

Turn Your Child's Drawing Into a 3D Character (and Make It Talk!)
ON THIS PAGE
Subscribe To Get Weekly Family AI Discoveries
Step 1: Sketch Out Your Ideas
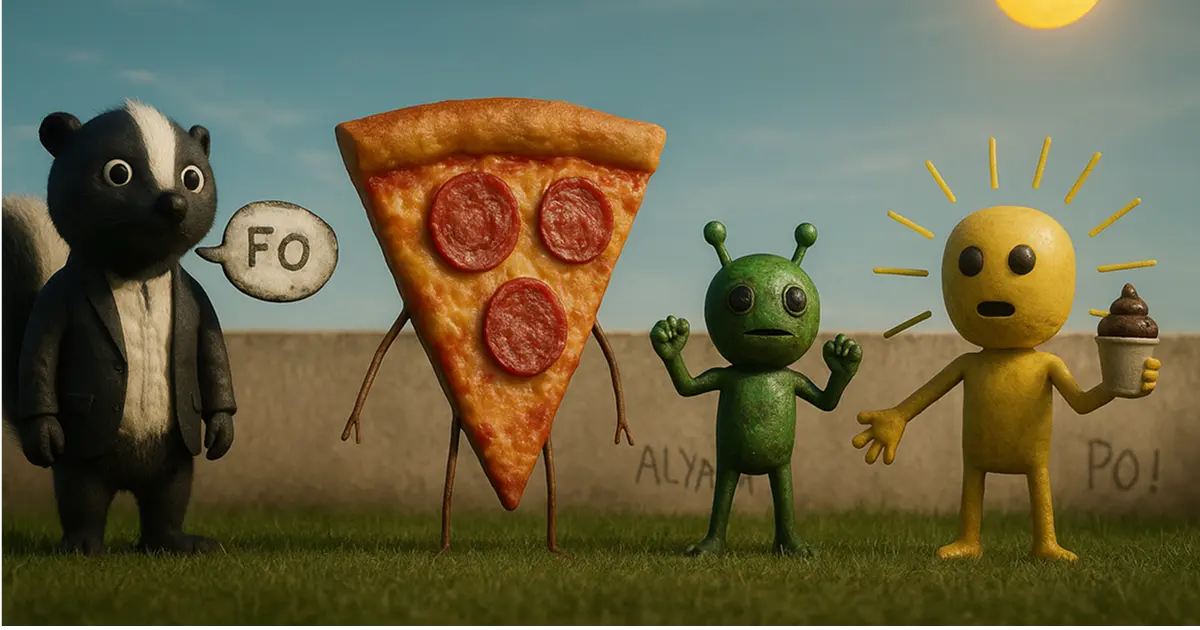
Sit down with your child and let them draw whatever comes to mind—aliens, pizza with legs, skunk-men in suits. The more imaginative, the better! Don't worry about artistic perfection; the goal is to capture their creativity, complete with any wobbly lines or quirky shapes.
💡 Parent Tip: This is a great way to encourage creativity and fine motor skills while introducing them to the magic of AI.
What you'll need
- Your child's drawing (any paper and coloring materials)
- ChatGPT Pro with GPT-4o enabled
- Hedra.ai account (free)
- Phone or device for clear photo of the drawing
- Voice recording app
Not sure which tool is right for your child?
Take our free 2-minute quiz and get personalized AI tool recommendations based on your child's age and interests.
Step-by-step instructions
🎨 Step 1: Sketch Out Your Ideas
Sit down with your child and let them draw whatever comes to mind—aliens, pizza with legs, skunk-men in suits. The more imaginative, the better! Don't worry about artistic perfection; the goal is to capture their creativity, complete with any wobbly lines or quirky shapes.
📸 Step 2: Capture the Drawing
Take a clear, well-lit photo of their drawing. Make sure the entire artwork is visible, with no shadows or folds. This will serve as the "blueprint" for the 3D render.
🤖 Step 3: Transform the Drawing with AI
Upload the photo to ChatGPT Pro (with GPT-4o enabled) or another image-capable AI tool. Use a prompt like this:
"Take this drawing created by my child and transform it into a photorealistic image or realistic 3D render. I don't know what it's supposed to be – it could be a creature, object, or something completely from their imagination. Keep the original shape, proportions, line lengths, and all imperfections exactly as they are in the drawing—including any slanted eyes, uneven lines, or strange markings. Do not correct, smooth out, or change any details of their design. Make it look like this thing exists in the real world, with realistic textures (skin, fur, metal, etc.) and natural lighting."
The AI will generate a 3D-like image that looks like it exists in the real world, while staying true to your child's design.
🎙️ Step 4: Animate Your Character with Voice
Once you have your 3D image, it's time to make it talk! Go to Hedra's animation tool:
- Upload the 3D image of your child's character
- Record a short voice note with your child (or yourself!) reading a script
- Keep it under 15 seconds for best results
- Upload the audio file and click "Animate"
The result? A fully animated, talking 3D character—straight from your child's imagination!
This project works because it validates your child's creativity while introducing them to cutting-edge AI technology. Seeing their simple drawing transformed into a photorealistic, talking character is both magical and educational.
The process encourages artistic expression without judgment — every "imperfect" line becomes part of the character's unique charm.
Creative extensions
- Character backstories: Have your child create a story about their 3D character
- Voice acting: Try different voices and personalities for the character
- Series creation: Make multiple characters from different drawings
- Social sharing: Add subtitles and background music for social media
Encouraging creativity
- Celebrate the "weird" drawings — they make the best 3D characters
- Let kids direct the voice recording process
- Save all versions to show the transformation process
- Use this as inspiration for more elaborate drawings
Common issues and solutions
- Drawing photo quality: Ensure good lighting and no shadows covering the artwork
- AI doesn't understand the drawing: Add more context to your prompt about what the drawing represents
- 3D result too different: Emphasize "keep original proportions exactly" in your ChatGPT prompt
- Voice animation issues: Record clear audio in a quiet room for best results